A residential roof is a system of six main layers, each doing a specific job. Most homeowners only see the shingles. What’s underneath is where quality diverges and where corners get cut.
The six main systems are: structural frame, roof deck (sheathing), protective layers (underlayment, ice and water shield, starter strip), flashing, roofing surface, and ventilation. Within those systems, there are roughly 15-17 named components, each with a distinct function and a distinct way of failing.
Pacific Coast Roofing Service has been replacing roofs in the Bay Area for 30+ years. California code, coastal fog, East Bay fire zones, and the region’s October-through-April rain season all shape how a roof gets built here. That’s the context missing from every manufacturer’s anatomy guide. This one is written for Bay Area homeowners.
The Main Parts of a Roof at a Glance
Here are all the major roof components, with a one-line description of what each one does.
| Component | What It Does |
|---|---|
| Rafters | Sloped framing members that form the structural skeleton of the roof |
| Trusses | Prefabricated engineered frames; the modern alternative to site-cut rafters |
| Collar beams | Horizontal members connecting opposing rafters; resist outward thrust under load |
| Ridge beam / ridge board | The top framing member at the peak; trusses or rafters connect to it |
| Roof deck (sheathing) | OSB or plywood panels spanning the rafters; the base every layer above attaches to |
| Eave | The lower edge of the roof that overhangs the exterior wall |
| Rake | The sloped edge running up the gable end |
| Fascia | Vertical board along the roof edge; gutters attach to it |
| Soffit | Underside of the eave overhang; houses the intake vents |
| Ridge | The peak where two roof planes meet at the top |
| Hip | The sloped external angle where two roof planes meet at a corner (not at the peak) |
| Valley | Where two roof planes intersect going inward; concentrates the most water on the roof |
| Gable end | The triangular wall section under a gable roof, between the two sloping planes |
| Dormer | A structure projecting from a sloped roof (for a window or attic space) |
| Drip edge | Metal strip at eaves and rakes; directs water away from the deck edge |
| Underlayment | Full-deck moisture barrier between deck and roofing surface |
| Ice and water shield | Self-adhering membrane at eaves, valleys, and penetrations; seals around fasteners |
| Starter strip | First course at the eaves; purpose-made to seal shingle bottom edges against wind |
| Step flashing | L-shaped metal pieces, one per shingle course, at walls and dormers |
| Valley flashing | Metal in the valley; handles the highest water concentration on the roof |
| Chimney flashing | Multi-piece system at the chimney; includes a cricket for chimneys over 30 inches wide |
| Kick-out flashing | Diverts water from a step-flashing run into the gutter at the bottom of a wall run |
| Pipe boot | Collar around vent pipe penetrations |
| Roofing surface | The visible weather barrier: asphalt shingles, metal panels, or tile |
| Ridge cap | Purpose-made product that closes the peak; not cut field shingles |
| Ridge vent | Continuous exhaust vent at the peak |
| Soffit vent | Intake vent at the eave; pairs with ridge vent for balanced attic airflow |
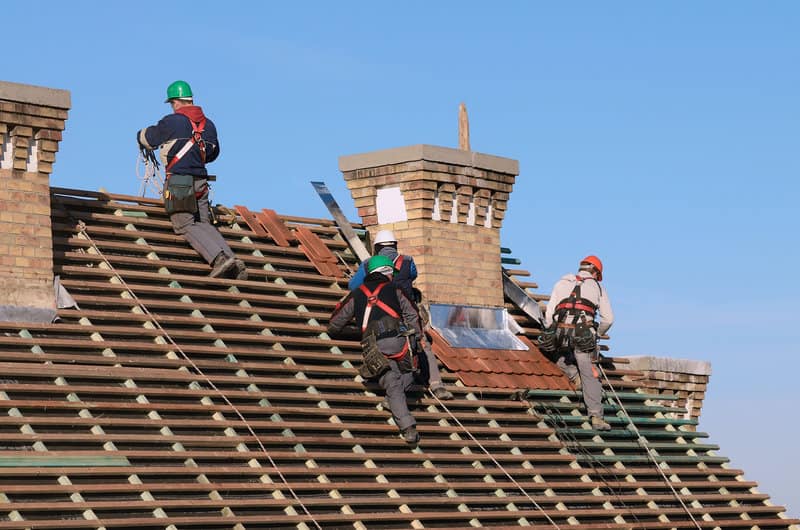
[EDITOR NOTE: Diagram required here. Contact Shannon Jackson (pcrsafety@gmail.com) for a PCR job photo showing a roof mid-install with layers visible. Add labeled callouts in post-production. Alt text: “parts of a roof diagram showing labeled components on a Bay Area residential roof.” If no photo is available before publication, use an SVG anatomy illustration as fallback. This diagram is not optional.]
The Structural Frame: What Holds Everything Up
The frame is what every layer above it depends on. Shingles, flashing, and underlayment can all be installed perfectly, but if the framing is wrong, the system fails.
ℹ️ California Deck Requirements
California code requires a minimum 7/16-inch or 1/2-inch OSB, or 1/2-inch CDX plywood for roof sheathing. Each panel carries a span rating stamp (for example, “24/16”) showing the maximum rafter spacing the panel is rated for. A panel installed on wider spacing than its rating fails the mandatory sheathing inspection and creates a structural liability. This inspection happens before any new material goes on the deck.
Rafters and Trusses
Two framing methods appear in Bay Area residential construction.
Prefabricated roof trusses are engineered off-site and craned into place. Trusses dominate Bay Area tract home construction built from the 1960s onward. They install quickly, meet consistent engineered tolerances, and are straightforward for inspectors to verify. The tradeoff is less open attic space, since the triangulated geometry occupies what would otherwise be usable headroom.
Stick framing uses site-cut rafters assembled piece by piece on the roof. It is more common in custom builds and in older Bay Area homes, particularly pre-1980 construction. It allows more attic flexibility but requires skilled field carpentry.
California code requires roof-to-wall connections at the wall plates designed to resist lateral movement during seismic events. Older Bay Area homes may have board-and-batten sheathing rather than panel sheathing, which gets flagged at inspection.
Roof Deck (Sheathing)
The roof deck is OSB (Oriented Strand Board) or plywood panels spanning the rafters. Every layer above depends on the deck being right.
California code requires a minimum 7/16-inch or 1/2-inch OSB, or 1/2-inch CDX plywood. Each panel carries a span rating stamp, such as “24/16,” indicating the maximum rafter spacing the panel is rated for. A panel installed on spacing wider than its rating fails inspection and creates a structural liability.
In coastal Bay Area environments where marine-layer moisture is present during installation, plywood is preferred over OSB for greater moisture stability when panels are exposed to salt air before the underlayment goes down.
The deck is where surprises happen. Once we strip the old covering, we sometimes find rot that wasn’t visible from below. That’s the first mandatory inspection point, before any new material goes on. A roofer who skips the deck inspection before laying new material is cutting corners you’ll pay for later.
Collar Beams and Ridge Member
Collar beams are horizontal members connecting opposing rafters in the upper third of the attic. They resist the outward thrust the roof generates under load, particularly in wind and seismic events common in the Bay Area.
One distinction matters here: a ridge beam is a structural member that bears the weight of the rafters at the peak. A ridge board is non-structural, serving as a nailing surface. In most Bay Area stick-framed homes, the peak member is a ridge board, not a structural ridge beam. The distinction matters if you are considering modifications to the attic space.
Edge and Geometry: The Shape of a Roof
Every roof has a geometry, and every point of that geometry has a name. These terms appear constantly in roofing estimates and inspection reports. Knowing them before the conversation starts makes it easier to understand what you’re paying for.
Eave and Rake
The eave is the lower edge of the roof that overhangs the exterior wall. Ice and water shield begins at the eave, drip edge is installed under the underlayment at the eave, and gutters attach to the fascia at the eave. The eave is the first line of defense against wind-driven rain at the roof edge.
The rake is the sloped edge of the roof running up the gable end, from the eave to the ridge. At the rake, drip edge is installed over the underlayment (the opposite of the eave installation sequence). The rake is a wind exposure point; kick-out flashing is important on windward-side rakes in the East Bay hills where a roof plane meets an exterior wall.
Fascia and Soffit
The fascia is the vertical board running along the roof edge, directly behind the gutters. Gutters attach to the fascia board. When fascia boards rot from moisture intrusion, gutters detach and water follows the wall face instead of draining away. See the gutter installation page for more on gutter systems and drainage.
The soffit is the underside of the eave overhang. Soffit vents sit here, forming the intake side of the attic ventilation system. Blocked soffits are one of the most common causes of ventilation failure in Bay Area homes. The vent opening may look clear from outside but be blocked from inside, where insulation was pushed against it during a previous re-roof.
Ridge, Hip, and Valley
The ridge is the horizontal peak where two roof planes meet at the top. It is capped with purpose-made ridge cap shingles and is where the continuous ridge vent runs.
The hip is the sloped external angle where two roof planes meet at a corner, not at the peak. Hip roofs have four of these sloping edges. Hip geometry resists wind loading better than gable geometry because there is no flat end surface for wind pressure to act against directly.
The valley is where two roof planes intersect going inward, forming a trough. More water flows through a valley per linear foot than anywhere else on the roof. Valley flashing is not the place to use light-gauge material or to cut installation time.
Gable Ends and Dormers
The gable end is the triangular wall section between the two sloping planes of a gable roof. Wind pushes directly against this flat surface during Bay Area winter storms. Properly braced gable framing resists racking under storm loads.
A dormer is a structure projecting from a sloped roof, typically for a window or additional attic space. Each dormer is its own small roof with its own drainage needs. Step flashing and kick-out flashing at dormer sidewalls are among the most common flashing failure points on Bay Area homes with dormers. If your home has dormers and you are getting a re-roof quote, ask specifically how the dormer flashing will be handled.
Homes with skylights present similar complexity. Each skylight requires its own flashing system. If you are considering adding a skylight during a re-roof, see our skylight installation page.
Roof Pitch
Roof pitch is the rise-over-run ratio. A 4:12 pitch rises 4 inches for every 12 inches of horizontal run. Pitch determines which roofing materials can be installed and how fast water drains off the surface.
Low-slope roofs (under 2:12) require different waterproofing systems than steep-slope roofs and fall outside the scope of standard asphalt shingle installation. If you have a low-slope section (common over garages or flat-roofed additions), that section needs to be evaluated separately.
The Protective Layers: Underlayment to Starter Strip
These are the layers nobody sees but everybody relies on when a storm hits.
💡 Check the Underlayment Spec on Your Bid
When comparing roofing estimates, find the underlayment line item. Felt (Type 15 or Type 30) costs less upfront and tears more easily. Synthetic woven polypropylene is the current standard: lighter, stronger, non-skid for installer safety, and UV-resistant for up to six months of exposure. Some shingle manufacturers also require synthetic underlayment to honor their extended warranty. If a bid specifies felt, that is worth a direct question.
Underlayment
Underlayment is the secondary moisture barrier that covers the entire deck, sitting between the deck and the roofing surface. If shingles fail or lift in a wind event, underlayment is what stands between the water and your roof deck.
Felt underlayment (Type 15 or Type 30) is the legacy material. It absorbs moisture over time, tears under foot traffic, and has limited UV exposure tolerance. Cost is its only real advantage.
Synthetic underlayment is the current standard. Woven polypropylene construction makes it lighter and stronger than felt, with a non-skid surface for installer safety and UV resistance rated for extended exposure (up to six months on some products). Some shingle manufacturers require synthetic underlayment as a condition of extended warranty coverage. This matters when you are comparing bids from different contractors.
Ice and Water Shield
Ice and water shield is a separate self-adhering polymer membrane, thicker than underlayment and fully adhered to the deck. It seals around fasteners so that nail holes cannot become water-wicking paths. This product is not the same as underlayment, and it is not optional.
California code (CRC R905.1.2) requires ice and water shield at eaves, extending at least 24 inches inside the exterior wall line, and in all valleys. In the Bay Area’s October-through-April rain season, wind-driven rain wicks under shingle laps at eaves even when shingles are intact. In valleys, the water concentration accelerates failure at anything that is not fully adhered to the deck.
Quality contractors go beyond the code minimum. On hillside homes in Orinda, Castro Valley, and the East Bay hills, we also apply ice and water shield at rakes on windward exposures and around dormers. The code sets the floor. Experience sets the standard.
Starter Strip
The starter strip is the first course installed at the eaves, before field shingles begin. A starter strip is a purpose-made product, not a field shingle cut to fit. It seals the bottom edge of the first shingle course and the tab slots against wind-driven water. Using a cut field shingle as a starter strip reduces wind resistance from the very first course up.
Flashing: Where Most Leaks Start
Flashing is thin metal (minimum galvanized steel G90 per California code, aluminum, or copper) installed at every point where the roof plane meets a vertical surface or penetration. It is the component most commonly skipped by contractors who are cutting costs, and it is the most common source of leaks on re-roofed homes.
⚠️ Reused Flashing = Future Leak
Old step flashing and valley flashing look intact after years of thermal cycling. The metal fatigues at bends and the sealant fails at joints long before visible damage appears. A quality re-roof includes all-new flashing at every location. If a written estimate does not specify new flashing, ask why before signing.
Step flashing is L-shaped individual pieces, one woven between each shingle course and the wall wherever the roof meets a vertical surface (walls, dormers). Step flashing is not continuous. A continuous piece traps water instead of shedding it. Each piece must be sized to match the shingle exposure.
Counter flashing is embedded into mortar or siding above the step flashing, covering its top edge. Step flashing without counter flashing is an incomplete system.
Valley flashing is a metal channel or continuous sheet in the valley. More water runs through a valley per linear foot than anywhere else on the roof. The gauge of the metal matters here.
Drip edge (CRC R905.2.8.5) is required on all California shingle roofs. The vertical leg must be at least 1.5 inches. At the eaves, drip edge goes under the underlayment. At the rakes, drip edge goes over the underlayment. The sequence is not interchangeable. Reversed installation compromises water management at the roof edge.
Pipe boots are the collar around vent pipe penetrations. Rubber pipe boots degrade faster than metal ones. Rubber pipe boots are the single most common source of localized roof leaks 5-10 years after installation. Quality installs use metal pipe boots.
Chimney flashing is a multi-piece system: base flashing against the chimney face, step flashing up the sides, counter flashing embedded in mortar joints. California code (CRC R905) requires a cricket, sometimes called a saddle, on the upslope side of any chimney wider than 30 inches measured perpendicular to slope. The chimney cricket redirects water away from the chimney-roof junction. Without it, water pools behind the chimney and eventually enters the structure.
Kick-out flashing diverts water from the bottom of a step-flashing run into the gutter, at the point where a roof plane meets an exterior wall. Omitting kick-out flashing directly causes rot at the wall-roof junction, especially at dormers and shed-roof additions. It is frequently skipped because it takes extra time and material.
Reused flashing is the most common reason a re-roof leaks within two years. Old flashing looks intact after years of thermal cycling, but the metal fatigues at bends and the sealant fails at joints. A quality re-roof includes all-new step flashing, valley flashing, chimney flashing, and drip edge. If a bid doesn’t specify new flashing at every location, ask why. The answer will tell you a lot about that contractor.
Roofing Materials: What Lasts and What It Costs
| Material | Lifespan | Installed Cost (2025 Bay Area) | Fire Rating | Notes |
|---|---|---|---|---|
| Architectural asphalt shingles | 25-30 years | $6.50-$9.00/sq ft | Class A (most) | Current residential standard; replaced 3-tab shingles as baseline |
| Standing-seam metal | 40-70 years | $13-$45/sq ft | Class A | Higher upfront; amortizes well over 50-60 year service life |
| Concrete/clay tile | 50-100 years | $10-$20/sq ft | Class A | Spanish Colonial / Mediterranean standard; requires structural verification |
Architectural asphalt shingles are the starting point for most Bay Area replacement projects. We install GAF Timberline HDZ and CertainTeed Landmark. Both carry Class A fire ratings per ASTM E108 / UL 790, meeting WUI zone requirements in the East Bay hills and Contra Costa County fire areas. Both are available in Title 24-compliant colors for Climate Zone 12 re-roofing projects. As GAF Certified Applicators, we can offer extended warranty terms that uncertified contractors cannot access. That is not a minor detail. It means your manufacturer warranty has a certified installer behind it, not just a product.
Standing-seam metal handles Bay Area coastal moisture and salt air corrosion better than most materials. The higher upfront cost, roughly $13-$45 per square foot depending on gauge and panel profile, amortizes well across 50-60 years of service life. On a typical 2,000-2,200 sq ft Bay Area home, a metal roof typically runs $18,500-$34,100 installed.
Concrete and clay tile is the correct material for Spanish Colonial and Mediterranean homes throughout the region. Tile is heavy. Concrete tile runs 9-12 lbs per square foot compared to 2-4 lbs for asphalt shingles. On a 2,000 square foot roof, the weight difference can exceed 16,000 lbs. California code requires a structural engineer to verify the framing can carry the load before installation begins. Any contractor who skips this step is taking a risk with your house, not theirs.
Wood shake is not a practical option for new California roofs. Fire code restrictions eliminate it in most of the state, including all Bay Area WUI zones, under Title 24 Part 7.
Roof Ventilation: The Layer That Controls How Long Everything Lasts
Ventilation is not one component. It is a paired system: soffit vents at the eaves (intake) and ridge vents at the peak (exhaust), working together continuously to move air through the attic space.
California Residential Code Section R806 sets the minimum net free ventilation area at 1/150 of the vented attic floor area. This ratio can be reduced to 1/300 when at least 40-50% of the required ventilation area is in the upper portion of the attic (near the ridge) and the rest is at the eave level. Balanced ventilation, with both intake and exhaust working together, is the only configuration that achieves this reduced ratio. Both the soffit vents and the ridge vents must be clear and functional.
Blocked soffit vents are a common post-installation failure in Bay Area homes. Insulation pushed against them during a re-roof leaves the vent opening visible from outside but blocked from inside. A thorough re-roof includes verifying soffit vent clearance from the attic side, not just looking at the exterior.
What under-ventilation does to a roof: in summer, an inadequately ventilated attic can reach 150°F, cooking shingles from below and potentially shortening a 25-year shingle’s service life to 15 years. In winter, moisture from the living space condenses on the cold deck and causes rot over time. Both GAF and CertainTeed include ventilation compliance as a condition of warranty coverage. If your attic ventilation does not meet the code ratio at the time of a warranty claim, the claim can be denied.
For more detail on how ventilation affects shingle life and what a balanced system requires, see our roof ventilation page.
Ridge vents without soffit vents are worse than no ridge vents at all. Without intake at the soffit, a ridge vent draws air from inside the living space instead of outside. That pulls conditioned air out of your home in winter and creates negative pressure in summer. Both vents must be present and balanced. Shingle manufacturers enforce this: if your attic ventilation doesn’t meet the code ratio requirements at the time of a warranty claim, your claim will be denied.
California Code Requirements Bay Area Homeowners Should Know
No competing guide covers California code. This is what separates an informed homeowner from one who gets surprised mid-project.
⭐ Two California Rules Worth Knowing Before You Sign
First: permits are required for every full roof replacement in California, no exceptions. A contractor who suggests skipping the permit is putting the risk on you, not themselves. Unpermitted work can void your manufacturer warranty and create problems at resale. Second: replace more than 25% of the roof surface and the entire project must meet current code. Many homeowners plan a partial repair and learn mid-project that they have crossed the threshold. Both rules are worth raising before the conversation starts.
Permits are always required. Full roof replacement in California requires a building permit, no exceptions. This applies regardless of home size, roofing material, or whether sheathing is being replaced. Unpermitted roof work is your problem at resale, not the contractor’s. Work done without permits can void manufacturer warranties. A contractor who suggests skipping the permit is a contractor you should not hire.
Two mandatory inspections, minimum. The first inspection is the sheathing and nailing inspection, before any new material goes on. The building inspector verifies deck condition, span ratings, fastener type, and fastener spacing. The second is the final inspection after all work is complete, covering flashing, underlayment coverage, the finished surface, and ventilation. Both are non-negotiable.
C-39 license. The C-39 is California’s roofing contractor license, issued by the California Contractors State License Board (CSLB). Verify any contractor at cslb.ca.gov before signing. The license should be active, bonded, and insured. If a contractor hesitates when asked for their license number, that is a red flag.
WUI fire zones. The East Bay hills, portions of Contra Costa County, and sections of Alameda County above the foothills are designated Wildland-Urban Interface (WUI) fire areas. Class A fire-rated roofing is required in these zones. The 2025 California WUI Code (Title 24 Part 7, effective January 1, 2026) expanded these requirements further. Most architectural asphalt shingles qualify. Wood shake does not.
The 25% rule. California code states that if you replace more than 25% of a roof surface during a re-roofing project, the entire project must be brought up to current code. This catches homeowners who plan a “partial repair” and find out mid-project that they are now doing a full replacement under current code requirements. Knowing this before the contractor conversation begins changes how you frame the scope and the budget.
Title 24 cool roof requirements. For re-roofing in Bay Area Climate Zone 12 (parts of Alameda, Contra Costa, and Solano counties) where more than 50% of the surface is being replaced, roofing materials must meet minimum Solar Reflectance Index (SRI) values. Most GAF and CertainTeed architectural shingles are available in compliant colors. BayREN (Bay Area Regional Energy Network) publishes the permit guide that Bay Area building inspectors use. Your contractor should know which climate zone applies to your property before pulling the permit.
See our roof maintenance checklist for a year-round guide to what to watch for on an existing Bay Area roof.
How a Roof Goes Together: The Installation Sequence
Understanding installation order matters because the sequence is where corners get cut. Each step depends on the one before it.
Step 1: Framing. Trusses or site-cut rafters go in first, with code-required seismic connections to the wall plates. On older Bay Area homes, existing framing is assessed for span rating compliance before proceeding.
Step 2: Sheathing. OSB or plywood panels are fastened to the framing. This is the first mandatory inspection point. The building inspector verifies deck condition, span ratings, fastener type, and spacing before any new material goes on.
Step 3: Underlayment and ice shield. Synthetic underlayment goes down first. Ice and water shield, which is self-adhering, is applied at the eaves (extending 24 inches inside the wall line), all valleys, and around every penetration. This is code-required per CRC R905.1.2. Quality contractors also apply it at rakes on windward exposures.
Step 4: Flashing and drip edge. Eave drip edge goes under the underlayment. Rake drip edge goes over the underlayment. The sequence matters. Step flashing is woven between shingle courses at all walls and dormers. All flashing should be new material on any re-roof.
Step 5: Starter strip and shingles. A starter strip is a purpose-made product, not a field shingle cut to fit. It goes at the eaves first. Field shingles follow in overlapping courses. Nail placement in the nail zone is critical.
Did You Know: Where a nail lands on a shingle changes how well it holds in wind. Every asphalt shingle has a printed nail zone, typically about an inch wide across the shingle face. Nails driven above that zone miss the reinforced layer and reduce the shingle’s rated wind resistance. This is one of the most common defects flagged on California residential roof inspections, and it is invisible once the next course goes on top.
Step 6: Ridge cap, ventilation, final inspection. Ridge cap is a purpose-made product, pre-bent for ridgeline exposure. Continuous ridge vents and functional soffit vents are verified for balanced ventilation before the final building inspection.
We replace roofs 12 months a year. Rainy season is a fine time. The sequencing has to be right, but we’ve been doing this since 1996.
Roofing Terms Explained
Sheathing (roof deck): OSB or plywood panels spanning the rafters; the structural base of the roof system.
Underlayment: Moisture barrier covering the entire deck between the deck and the roofing surface. Synthetic underlayment is the current standard; felt underlayment (Type 15 or Type 30) is the legacy option.
Ice and water shield: Self-adhering polymer membrane at eaves, valleys, and penetrations. Required by California code (CRC R905.1.2) at these locations. Seals around fasteners to prevent water wicking through nail holes.
Flashing: Thin metal wherever the roof meets a vertical surface or penetration. Galvanized steel G90, aluminum, or copper. Directs water away from seams and joints.
Drip edge: Metal strip at eaves and rakes preventing water from wicking under shingles at the roof edge. Required by California code (CRC R905.2.8.5). Installation sequence differs at eaves (under underlayment) vs. rakes (over underlayment).
Starter strip: The first course at the eaves. A purpose-made product, not a cut field shingle. Seals the bottom edge of the first shingle course against wind-driven water intrusion.
Eave: The lower edge of the roof that overhangs the exterior wall. Where drip edge goes under the underlayment. Where gutters attach to the fascia.
Rake: The sloped edge of a gable end, from eave to ridge. Where drip edge goes over the underlayment.
Fascia: Vertical board along the roof edge behind the gutters. If fascia rots from moisture, gutters detach.
Soffit: Underside of the eave overhang. Houses the soffit vents (intake side of the attic ventilation system).
Ridge: The horizontal peak where two roof planes meet at the top.
Hip: The sloped external edge where two roof planes meet at a corner (not the peak). Hip roofs have four of these. Hip geometry provides better wind resistance than gable geometry.
Valley: Where two roof planes intersect going inward. High water concentration zone. Requires valley flashing rated for the water volume it carries.
Gable end: The triangular wall section at the end of a gable roof, between the two sloping planes.
Dormer: A structure projecting from a sloped roof. Has its own small roof, its own drainage, and its own flashing requirements.
Kick-out flashing: Diverts water from a step-flashing run into the gutter at the base of a wall run. Frequently skipped; frequently the cause of wall rot at dormer and addition joints.
Cricket / saddle: Small diverter ridge structure behind a chimney. Required by California code (CRC R905) for any chimney wider than 30 inches perpendicular to slope.
Roof pitch: The rise-over-run ratio. A 4:12 pitch rises 4 inches for every 12 inches of horizontal run. Roofs below 2:12 are low-slope and require different waterproofing systems than steep-slope roofs.
Architectural shingle: Multi-layer laminated asphalt shingle. Current residential standard, replacing 3-tab shingles as the baseline product.
Valley flashing: Metal in the roof valley. Handles more water per linear foot than any other location on the roof surface.
Ridge vent: Continuous exhaust vent at the roof peak. Must be paired with soffit vents to achieve balanced ventilation.
Net free ventilation area: The measured open area of vents after screening and baffles; used to calculate compliance with California Residential Code Section R806.
Span rating: Stamp on OSB or plywood panel (e.g., “24/16”) indicating the maximum rafter spacing the panel is rated for. A panel installed on wider spacing fails the sheathing inspection.
Frequently Asked Questions
What are the main parts of a roof?
A residential roof has six main systems: structural frame (rafters or trusses, roof deck), underlayment and ice and water shield, flashing (step, valley, chimney, drip edge), roofing surface (shingles, metal, or tile), ventilation (ridge vents and soffit vents), and edge components (eave, rake, fascia, soffit). Within those systems, there are 15-17 named components, each with a specific function.
What is the 25% rule in roofing?
In California, if you replace more than 25% of a roof surface during a single re-roofing project, the entire project must be brought up to current building code. This matters because homeowners sometimes plan a limited repair and find mid-project that they have crossed the 25% threshold, triggering full code compliance requirements. Knowing this before the conversation with a contractor starts can change how you frame the scope and the budget.
What ruins asphalt shingles?
Four causes account for most premature shingle failure. First: poor attic ventilation. An attic that reaches 150°F in summer cooks shingles from below, often cutting a 25-year shingle’s service life nearly in half. Second: nails driven outside the printed nail zone, which reduces rated wind resistance and allows shingles to lift. Third: improperly set or reused flashing that traps moisture at the deck, creating rot below the shingles before the surface shows any visible damage. Fourth: installation onto a wet or deteriorated deck. Shingles installed over a compromised base fail on the base’s timeline, not the shingle’s rated lifespan.
Is $30,000 too much for a roof in the Bay Area?
Not necessarily. Architectural asphalt shingles run $6.50-$9.00 per square foot installed. A 2,000 square foot roof with moderate complexity typically falls between $14,000-$22,000 for shingles. Standing-seam metal or tile on the same roof runs higher. Complex geometry, hidden deck damage discovered at tear-off, WUI-zone fire rating requirements, and premium materials all push the number up. $30,000 is within normal range for a larger or more complex Bay Area roof. Get an itemized written estimate before signing, and confirm the estimate specifies new flashing at every location.
Do I need a permit to replace my roof in California?
Yes, always. Full roof replacement requires a building permit regardless of home size, material, or location. California Residential Code requires two inspections minimum: one before new materials go on (sheathing and nailing), and one after all work is complete (final). Work done without permits can create problems at resale and may void manufacturer warranties.
How long does a roof replacement take?
Most Bay Area homes take one to three days. Smaller, simpler roofs can be done in a day. Larger roofs, roofs with complex geometry (multiple valleys, dormers, multiple chimneys), or roofs where hidden deck damage is found at tear-off run longer. Your contractor should give you a realistic window before starting, not a number they adjust after the job has begun.
What is the difference between underlayment and ice and water shield?
They are two separate products with related but distinct functions. Underlayment is the moisture barrier that covers the entire roof deck between the deck and the roofing surface. If shingles fail or lift, underlayment is the next line of defense. Ice and water shield is a self-adhering membrane applied specifically at the highest-risk zones: eaves, valleys, and around every penetration. Ice and water shield seals around fasteners, preventing water from wicking through nail holes. California code (CRC R905.1.2) requires both, and specifies where the ice and water shield must be placed. Both go on before any shingles.
What caused my roof to leak after it was just replaced?
The most common cause is flashing that was reused instead of replaced. Step flashing at walls and dormers, chimney flashing, and valley flashing all go through thermal cycling every year. Old flashing can look intact and still fail within a season because the metal has fatigued at bends or the sealant has cracked at joints. The second most common cause is nail placement outside the nail zone, which reduces wind resistance and allows shingles to lift in storm conditions. If a roof leaks within a year of replacement, start by asking whether all flashing was replaced and whether the job had a final building inspection.
What should I ask a roofing contractor before hiring them?
Four questions cover the ground that matters most. First: what is your C-39 license number? Verify any California roofing contractor at cslb.ca.gov in about two minutes. The license should be active, bonded, and insured. Second: will you pull the permit? The correct answer is always yes. Third: will all flashing be replaced, or will existing flashing be reused? Ask specifically about step flashing, valley flashing, chimney flashing, and drip edge. Fourth: are you a certified applicator for the shingle manufacturer? GAF Certified Applicators can access extended warranty terms that uncertified contractors cannot offer. A contractor who deflects on any of these is worth reconsidering before you sign.
Hiring a Bay Area Roofer: What to Look For
Knowing what a roof is made of tells you exactly what questions to ask before hiring anyone.
🎯 Get a Bay Area Roof Assessment
Pacific Coast Roofing Service has replaced roofs in Contra Costa, Alameda, and Solano counties since 1996. We pull permits, replace all flashing, and work 12 months a year. As GAF Certified Applicators, we can access extended warranty terms that uncertified contractors cannot offer. Call (510) 912-5454 or request an estimate online.
Start with the C-39 license. California’s roofing contractor license is public record. Look up any contractor at cslb.ca.gov before you sign anything. Two minutes tells you whether the license is active, whether there are complaints on file, and whether the contractor carries the required bond and liability insurance.
Ask whether they pull permits. The answer should always be yes. A contractor who offers to skip the permit is putting that risk on you, not themselves.
Ask whether they replace all flashing. Specifically: step flashing at walls and dormers, valley flashing, chimney flashing, and drip edge. Reusing flashing from the previous roof is one of the most common ways a re-roof fails within a few years.
Ask about manufacturer certification. As GAF Certified Applicators, we can access extended warranty terms that uncertified contractors cannot offer. That credential applies to GAF Timberline HDZ and CertainTeed Landmark. It is a meaningful difference in coverage, not a marketing detail.
Year-round availability matters in the Bay Area. Most rainfall arrives October through April. A contractor who only works in dry conditions will either make you wait through winter or rush the job to beat the weather.
Over ninety percent of our customers are referrals. We’ve been replacing roofs in the Bay Area since 1996, covering Contra Costa, Alameda, and Solano counties.
If your roof is showing any signs of wear, age, or damage, we can take a look. Call us at (510) 912-5454 or visit pcroofingservice.com/contact/. We cover Contra Costa, Alameda, and Solano counties, and we work 12 months a year.